You see, we have a bit of DIY ADD around here. We have a big brainstorm and get a great idea for a little home improvement project and "BAM!" we jump right in. Halfway through, more inspiration hits (or we hit a snag) and we are opening up a whole new can of worms (or tearing up floors) all while *trying* to finish the first project.
I knew what the hubby was thinking, "How many other projects do we have going on around here? Why do we need to start one more?" But this time, I had a plan. . .this would be my birthday gift from the hubby! No shopping required (besides Home Improvement stores, and what guy is going to turn THAT down?), no guessing at what I might want (I had inspiration pictures, remember?), no tedious wrapping paper involved--it was a win-win for everyone! Well, until we looked at our schedules around January (my birthday month). We were swamped with other obligations! No time for DIYing here. So I agreed to wait a bit. . .
Valentine's Day rolled around and the hubby asked for gift suggestions. "The Craft Closet," I quickly answered. No flowers, no chocolate, no jewelry, just a little demolition and construction in the living room closet--too much to ask? I think not.
The weekend after Valentine's Day, I began to realize that Step One of this project was contingent upon ME cleaning out the closet to make way for the facelift. So. . . while the hubby was away at a weekend training session, I emptied the contents of the
Well, you can just imagine the hubby's excitement when he came home and witnessed my work!
 |
| All that was left once I removed all of the craft supplies. . . |
Not only had I emptied the contents of the closet into the living room floor and surrounded it with a baby fence to keep the little people from pilfering through the goods, but I had also drawn out plans for the shelving and desk that I envisioned inside the now-empty space.
The hubby completed what I started by removing what was left of the doors and shelving. . .
 |
| Doors removed and "shelves" ready to come down. |
 |
| Ready for a New Look!! |
After we corrected confirmed my plans and measurements, we set off to the big box Home Improvement store to pick out and price wood and accessories.
Supplies were purchased and the transformation began. . .
 |
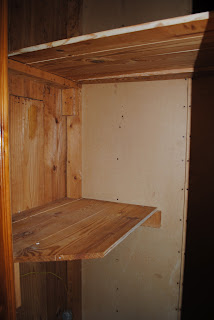
The hubby spent the next weekend measuring, cutting, and installing the shelving and desk that I, um, we designed.
 |
| Project Supervisor! |
Pretty soon it looked something like this. . .
 |
| (note the baby gate "holding pen" for the closet contents) |
A closer look. . .
Shelves! Storage! Work space!
While the hubby was busy working his magic, I had been shopping for accessories. . .
 |
| Storage units from Habitat for Humanity $8 each (there were two more in the garage) |
 |
| Thrift Shop Chair $5 (I spied it first, the hubby wasn't crazy about it, but after thinking about it, I sent my daddy back to snag it!) |
So, we went from a total disaster to a closet full of shelves. . . What next? Why priming and painting, of course!
Stay tuned!


No comments:
Post a Comment